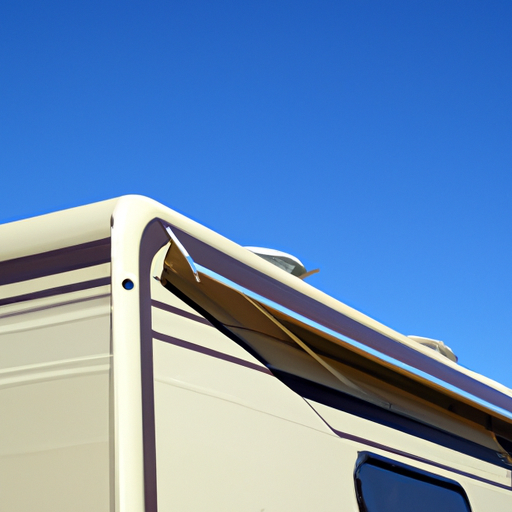
How To Prepare Your RV Roof for a Coating
| November 20, 2023Step-by-Step Guide for Properly Prepping Your RV Roof for a Coating
- Inspect the Roof
Before beginning any maintenance or coating work on your RV roof, it is essential to conduct a thorough inspection. Look for any signs of damage, such as cracking, tearing, or warping, and make sure to note any areas that may require extra attention. - Clean the Roof
Once you have identified any damage that may need to be addressed, it is time to clean the roof. Start by using a mild detergent to rinse away any dirt, grime, and debris. Next, use a pressure washer to remove any stubborn residues that may remain. Make sure to dry the roof with a towel or absorbent cloth after the cleaning process is complete. - Repair Any Damage
If you identified any damage during your inspection, it is now time to repair it. Depending on the severity of the damage, you may be able to use a patch kit to fix any small holes or tears. If the damage is more extensive, it may be best to contact a professional to conduct the repairs. - Apply a Primer
Once the repairs are complete and the roof is completely dry, it is time to apply a primer. Primer is designed to prepare the surface for a new coating and ensure proper adhesion. Make sure to follow the manufacturer’s instructions for the best results. - Apply a Coating
Finally, you are ready to apply your chosen coating. Depending on the type of coating you are using, you may need to apply multiple coats. Allow each coat to dry before applying the next one. Once all of the coats are applied, it is important to allow the roof to cure for at least 24 hours before walking on it.Following these steps will ensure that your RV roof is properly prepped and ready for a new coating. After allowing the roof to cure, you will be able to enjoy the benefits of a renewed and protected roof for years to come.
Get Your RV Ready for a Durable Roof Coating with This Comprehensive List of Prep Tasks
Preparing your RV for a durable roof coating is a must for keeping it in peak condition. Taking the time to do a thorough job of prepping the surface will ensure that the coating will adhere properly and provide superior protection. The following is a list of tasks that must be completed before applying a roof coating:
- Clean the Roof: Begin by removing any debris that may have accumulated on the roof. This can be done with a broom and a hose. Make sure to use a mild detergent or a specialized RV cleaner to remove dirt and grime.
- Inspect the Roof: Once the surface has been cleaned, it’s time to inspect the roof for any signs of damage, such as cracks, dents, or tears. If any damage is found, it should be repaired before coating the roof.
- Apply a Primer: If the roof is in good condition, a primer should be applied to the surface. This will help the coating to adhere properly.
- Apply Caulk: Seal any seams or openings with a waterproof caulk. This will help to prevent water from seeping in and damaging the roof.
- Apply the Roof Coating: Once all of the prep tasks have been completed, the roof coating can be applied. Make sure that the coating is applied according to the manufacturer’s instructions.
By following these steps, you can ensure that your RV roof is properly prepped and ready for a durable roof coating. Taking the time to do a thorough job of prepping will provide superior protection from the elements and keep your RV in peak condition for years to come.
Essential Tips for Cleaning and Conditioning Your RV Roof Before Applying a Coating
If you own an RV, you know that regular maintenance is essential to keeping it in top condition. One of the most important tasks you must undertake is cleaning and conditioning your RV roof before applying a coating. Without proper preparation, the coating won’t last and could cause damage to the RV. Here are some essential tips to help you clean and condition your RV roof before applying a coating:
- Inspect the roof for damage. Before you start any cleaning or conditioning process, inspect the roof for any damage. Look for signs of rust, rot, or cracks. If you find any damage, repair it before you proceed. If you don’t, the coating won’t adhere properly and could cause further damage.
- Remove any debris. The next step is to remove any debris on the roof. This includes leaves, branches, dirt, and other debris. Use a soft brush to gently sweep off the debris and dispose of it properly.
- Wash the roof. Now that the debris is removed, it’s time to wash the roof. Use a mild detergent and water to gently wash away dirt and grime. Make sure to rinse the roof thoroughly to remove any soap residue.
- Condition the roof. After the roof is clean and dry, you can apply a roof conditioner to help protect the surface from UV rays and oxidation. This will also help the coating adhere better.
- Apply the coating. Once the roof is clean and conditioned, it’s time to apply the coating. Follow the instructions on the product carefully to ensure the best results.
By following these tips, you can ensure your RV roof is properly cleaned and conditioned before applying a coating. With proper maintenance, your RV roof will stay in excellent condition for years to come.
A Checklist For Ensuring Your RV Roof is Ready for a Protective Coating
- Clean the RV Roof: Make sure to clean the roof thoroughly before applying the protective coating. This can be done with a pressure washer or a soft-bristle brush and a mild detergent solution.
- Inspect the RV Roof: Carefully inspect the roof for any cracks, tears, or other damage. If any damage is found, it should be repaired before the protective coating is applied.
- Remove Debris: Be sure to remove any dirt, leaves, twigs, or other debris from the roof. This can be done with a soft-bristle brush or a vacuum cleaner.
- Sand the RV Roof: Use a sanding block and medium-grit sandpaper to lightly sand the roof. This will help to create a better bond between the protective coating and the roof.
- Rinse the RV Roof: Rinse the roof with clean water to remove any remaining dirt or debris.
- Dry the RV Roof: Allow the roof to dry completely before applying the protective coating.
- Apply the Protective Coating: Use a roller or brush to apply the protective coating to the RV roof. Be sure to follow the manufacturer’s instructions for application.
- Allow the Coating to Dry: Allow the protective coating to dry completely before walking on the roof or using the RV.
The Complete Guide to Preparing Your RV Roof for a Coating to Extend its Life
Preparing your RV roof for a coating is an important step in extending its life and keeping it in optimal condition. Taking the time to properly prepare the roof before applying a coating is essential in order to ensure a long-lasting, effective coating. This guide will cover the complete process of preparing an RV roof for coating, from cleaning to prepping and more.
Cleaning: The first step in the process is to clean the RV roof. Remove any debris, dirt, and mildew using a soft-bristled brush and a mild detergent solution. Rinse the roof with clean water and allow it to dry completely before moving on.
Inspection: Next, you should inspect the roof for any signs of damage, such as cracks, holes, or other irregularities. If any are found, they will need to be repaired before moving on.
Sanding: Once the roof is cleaned and inspected, you will need to sand it in order to provide a smooth surface for the coating to adhere to. Use a medium-grit sandpaper or a handheld sander to thoroughly sand the entire roof, including any areas where repairs were made.
Priming: After sanding, the next step is to apply a primer. This will help ensure the coating adheres properly to the RV roof and will help extend its life. Use a roller or brush to apply the primer, taking care to cover the entire surface. Allow the primer to dry completely before moving on.
Caulking: Before applying the coating, you should apply a quality caulking around the edges, vents, and other seams. This will help ensure a seamless, waterproof seal that will protect your RV roof for years to come.
Coating: Finally, you can apply the coating. Depending on the type of coating you are using, the application process may vary. However, it is important to follow the manufacturer’s instructions to ensure the best results. Allow the coating to dry completely before enjoying your newly protected RV roof.
By following these steps, you can easily prepare your RV roof for a coating and extend its life. With a little time and effort, you can protect your RV roof and keep it looking its best for years to come.