Camper Maintenance is the most effective way to preserve its value and to avoid damages. We’ve therefore created a list of nine easy ways to clean and maintain your RV roof.

Over time the process of oxidation begins to cause irreparable damage to the structure of your roof. If this occurs the water will seep into your walls, ceiling as well as any electrical components that are in between. As you’ve probably guessed, electricity and water aren’t good friends and could cause the cost of hundreds of dollars in repairs. Connectors could burn out which can cause the outlets to fail. Also, you could put your family members or yourself at risk of electrocution.
The damage caused by water is also harmful to your health as constant humidity and moisture encourage the growth of mold. The growth can cause allergens, germs, and a persistent, long-lasting smell. The spores that are breathed in can cause breathing problems and symptoms of illness. This can also reduce the value of your RV and cause damage to the interior.
By taking preventive measures, you are able to stop or reverse the process. Taking care of the cleaning process and treatment can prevent breaks leaks, cracks, and the growth of mold. A thorough clean can take time but is worth the effort at the final. For optimal results, you should clean your RV roof regularly and with attention to detail.
Types of RV Roofs
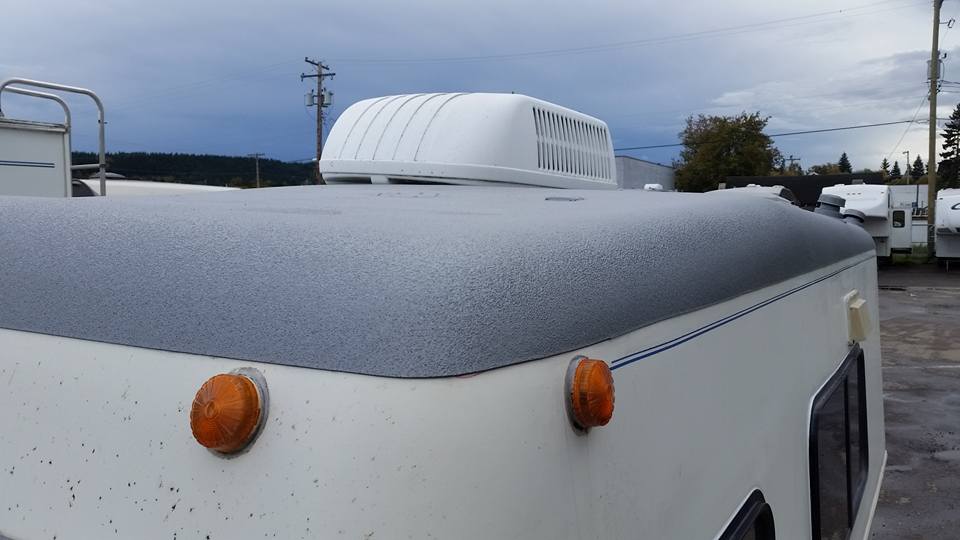
When you are buying a camper, be sure to inquire about the kind of roof. Poor roofing material can cause breaks and tears that allow water to enter the cracks. Damage to the roof can be swift and is among the most difficult problems to resolve, as it is often the cause of mold, which can damage the interior. The use of a sturdy, durable RV roof helps to prevent this from happening and guarantees a long-lasting and comfortable experience.
The roofs of these RVs are made of wooden boards covered by an enveloping layer of rubber that is made from either ethylene-propylene monomer (EPDM) or thermoplastic Olefin (TPO). While both are made of rubber, they each have distinct characteristics and distinct maintenance protocols.
EPDM is among the most popular as well as reliable RV roof materials. It is generally referred to by the title of “synthetic rubber” and many manufacturers use it in their designs. An EPDM roof made of a rubber roof is much less expensive and is more resistant to UV light and has a long-lasting durability when compared to the “natural” equivalent.
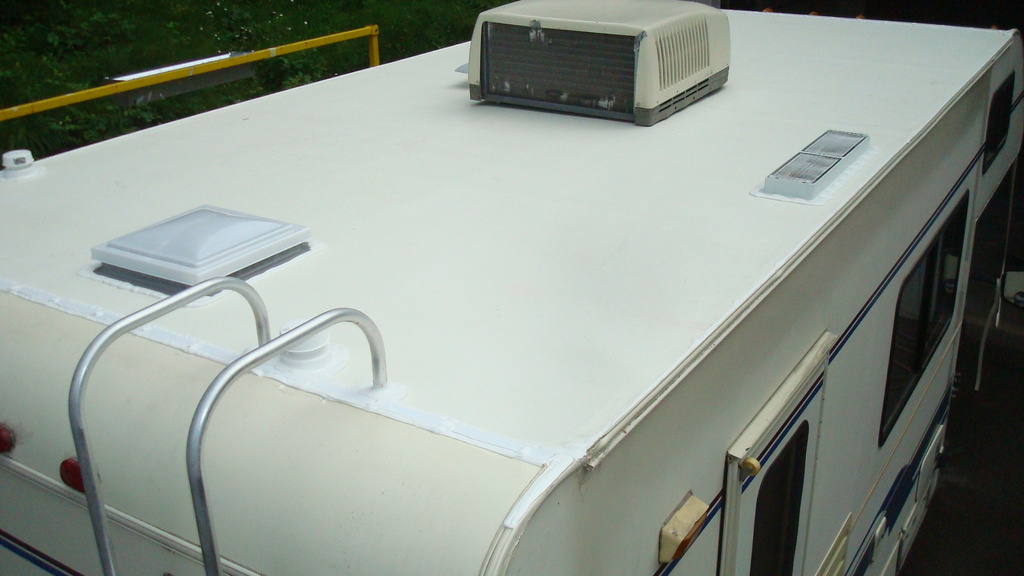
This kind of rubber is ideal for flat roofs because of its strength and durability, which makes it suitable for RVs especially. EPDM is not just resistant to water, but also stops chemicals from mixing into liquid. Based on the kind of roof the moisture could mix with harmful substances, creating damage and possibly poisoning. To avoid this problem, choose the only EPDM roof made of rubber roof and regularly cleaning it. With their low maintenance requirements and simple cleaning, anyone can easily keep the RV roofing with rubber roof.
TPO is becoming more and more sought-after within The TPO market is growing increasingly popular within the RV world. Many believe that it will one day surpass EPDM because of its preferred attributes. TPO roofing is able to block sunlight, which can reduce the absorption of heat. The ability to keep your RV cool means less stress on your air cooling system and cut down the energy use. In addition, it’s sturdy and extremely resistant to dirt, mold and tears. TPO is the most economical and effective version of polyvinyl chloride (PVC) roofing. It is different from the plastic PVC material because TPO is a rubber-based material. Maintenance is easy provided you follow the correct guidelines.
Why is it Important to Clean an RV Rubber Roof?
Regular roof cleaning removes dirt and grime, while also extending its lifespan. Exposed to water, rain and ice along with other elements of the outdoors can cause damage to rubber in time. As the roof begins to weaken, it becomes more susceptible to cracks tears, and caulking gaps. The moisture can eventually get into these cracks, causing costly repairs.
No matter if your house or apartment or camping vehicle, water damage can occur virtually everywhere. The moisture can destroy mechanical and electrical components of your RV and you’ll need to replace the components. The areas that are damp eventually transform in to black mold, fungi and black mold which could cause health issues and respiratory issues.
In areas with shade, parking is a risky way to increase the likelihood of the growth of mildew or mold. Being under trees can also be an issue as falling seeds and fruit encourage roof moisture. Make sure to keep your equipment in sunny areas in order to ensure that the rubber is dry and maintain its cleanliness.
Additionally, RV insurance does not cover water damage for the majority of it. Thus, cleansing the RV roof at minimum four times per year can be cost effective and avoids costly damages. If you reside in an area with high levels of pollution it is recommended to take care to clean your RV more frequently to ensure the cleanliness of your rubber.
9 Easy Tips for Cleaning Your RV Rubber Roof
1. Be Safe
Cleaning your RV roof requires climbing up the structure and carrying out manual work. The process itself is dangerous enough however when you add water and soap in the process, the situation can be particularly dangerous. The risk of falling and slipping could be fatal and usually will result in a trip the hospital.
To ensure this, employ a spotter and ensure that they are always watching. Make sure you have a sturdy ladder and ensure it’s stable in relation to the RV. Lift your cleaning equipment as well as the bucket and brush up with rope. Wear only shoes with grips and do not walk on wet surfaces.
Related Reading: Also, there are both correct and unsafe areas to walk on the RV roof. Go through my post titled Do I Have the Right to Walk on my RV Roof? to find out more details and a short video explaining the best ways to be able to walk safely on your RV roof without danger.
2. Clean and thoroughly inspect the Roof
Get on your roof and clean any excess debris away. Now is the best time to check for sap, mold, mildew or any other contaminant. Also, look over the seams and caulk for breakage or leaks. Repair these issues immediately to prevent any damage to the rest of your home.
3. Cleanse Your RV Roof Prior to Cleaning
Make use of a hose to clean and eliminate the dirt and grime that has accumulated. For roofs that are extremely dirty be sure to wrap both sides of the RV using plastic. It will stop filthy water from pouring down and staining.
4. Pick Your Brush Based On Your the Needs of
A long-handled sponge is the best choice to get rid of dust and dirt. This extension provides you with the possibility of standing on the ladder so you don’t have to fret about falling off the roof the top. Make use of a medium bristle brush to clean the general area, since it will get rid of most of the dirt. For tougher stains, utilize an abrasive brush that is soft to scrub the particular region.
5. Only Use Non-Corrosive Rubber that is approved
When selecting a roofing cleaner that is a rubber roof cleaning product take note that petroleum distillates can destroy latex and could end the warranty. Swelling, sections with uneven thickness, and loose spots happen after direct contact. The chemical releases the adhesives that cause to cause the roof membrane to expand. Utilizing other abrasive cleaners as well as citrus solvents that are acidic increases the chance of corrosion due to the fact that they strip the rubber.
Use only cleaners and chemicals without petroleum distillates in order to keep the integrity of the roof. Consult the owner’s manual or the manufacturer’s guide to choose the ideal soap to clean your RV. Some examples for safe chemicals include premium cleaning products or mild laundry detergent dilute by water.
To remove sap residue, pour mineral spirits to the bristles of a soft brush and rub it over the area. If you see mildew or mold you can dilute vinegar or bleach (not in combination!) by using water, then scrub.
6. Clean the rubber sections
To protect yourself, ensure that you clean your RV from the front to the back. In this way, you will be able to get off the ladder without falling on the wet hard, slippery surface. With the spray bottle to cover a 3 foot by 3 feet area. After that, use the brush of choice to scrub with an arc. Use moderate pressure but not excessively, because you don’t want to harm the rubber. Clean the dirt from the bucket, and then continue to mop.
7. Rinse thoroughly to avoid Refusive Buildup On Roof and Sidewalls
After cleaning, wash thoroughly to eliminate any remaining dirt and dirt. Take extra care of roof walls and sides to avoid a buildup of residue. Inability to hose down these areas in a timely manner could cause more problems.
Be careful not to slide off the wet roof. As we’ve said before cleaning from the front to the back is safer. As you climb off, make sure to not step on either the exhaust or air conditioner because this could be dangerous.
8. Repeat the Procedure Until the Roof is Clean
By keeping up with your regular maintenance it is only necessary to wash your RV roof at least once. If you haven’t cleaned your roof in some time, it could require a couple of times. While it is an arduous task but it’s beneficial in the long run. Reducing the risk of water damage and leaks is cost-effective and keeps the overall quality in your RV.
9. Clean Your RV Roof at Least Four Times Each Year
Cleaning and maintaining your RV roof frequently can make the procedure much more pleasant. So, it is recommended to take care of the roof at least 4 times in the course of the year. If you live in polluted areas or have the RV under trees ought to take care to clean the RV regularly. Examining your roof can also give you the opportunity to address any issues that could be causing problems prior to them causing damage to the rubber.
How to Care for Your RV Roof after Cleaning
The treatment of the RV roof in the aftermath of cleaning it is among the primary factors in the accumulation of residue. RV Roof treatment protects against sun damage and helps prevent the formation of oxidation. They also contain chemicals that ward off contaminants, such as droppings of animals and trees and dirt and dirt.
You can purchase EDPM as well as TPO safe protections through the internet or in your local RV retailer. Ask about products that are free of corrosion-causing chemicals to ensure that you don’t make any mistakes.
You can apply the roof treatment right after washing the RV roof. It will take about 16 to 20 ounces of water to completely cover the area. Spray in 3-foot-by-3-foot sections and spread using an aqueous, damp sponge mop. Repeat this process until you cover the entire roof. It will take 24 hours to air fully dry.

Conclusion
As with everything, properly maintaining your RV extends its life and helps prevent further problems. Secure your investment by selecting environmentally friendly rv roofing made from rubber roof while giving your RV a regular thorough clean. Be sure to select safe, non-corrosive brushes as well as cleaners. To keep your RV roof protected for many years to come you can also do protective coatings such as ArmorThane. Click here to learn more about ArmorThane’s RV Roof protection.

