RV Roof Soft Spots: Find Rotted Decking and Fix It Right
In short
What causes RV roof soft spots, how to find them and tell them from harmless bubbles, a severity checklist, and how rotted decking is repaired.
On this page
A soft spot on an RV roof almost always means the wood decking under the membrane has gotten wet and started to rot, usually from a leak at a vent, skylight, seam or roof edge. The fix is to stop the leak, cut out the rotted decking back to solid wood, check the framing and insulation underneath, install new decking and seal the roof surface over it. A small spot around one fixture is a manageable repair. Soft areas in several places, or a ceiling that sags, mean a bigger job and usually a professional.
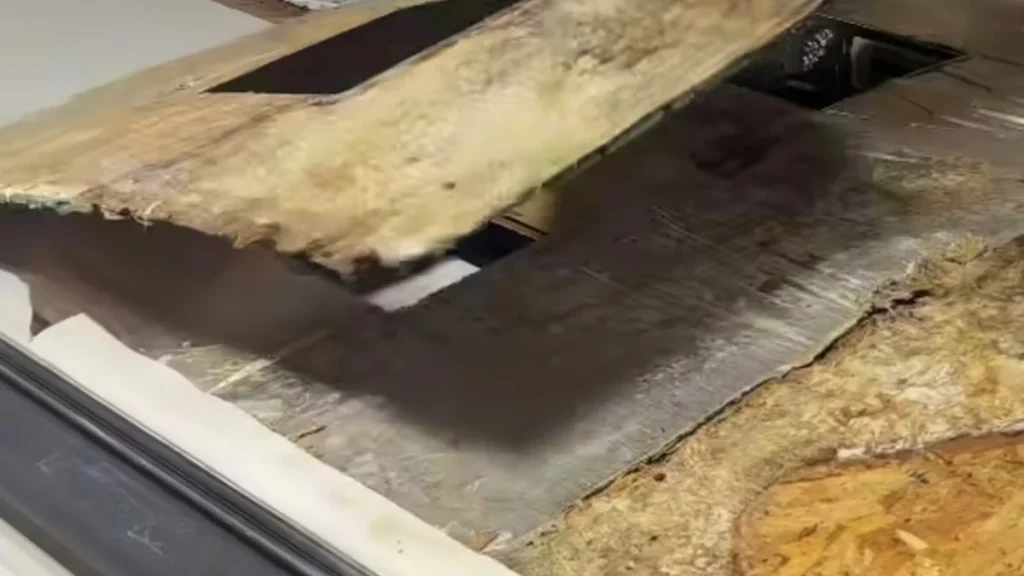
This guide shows you how to find soft spots, how to tell real rot from harmless bubbles, how bad yours is (there’s a severity checklist below), how the repair is done, and how to keep it from happening again. The photos come from real RV roofs opened up in the shop.
What a soft spot really is
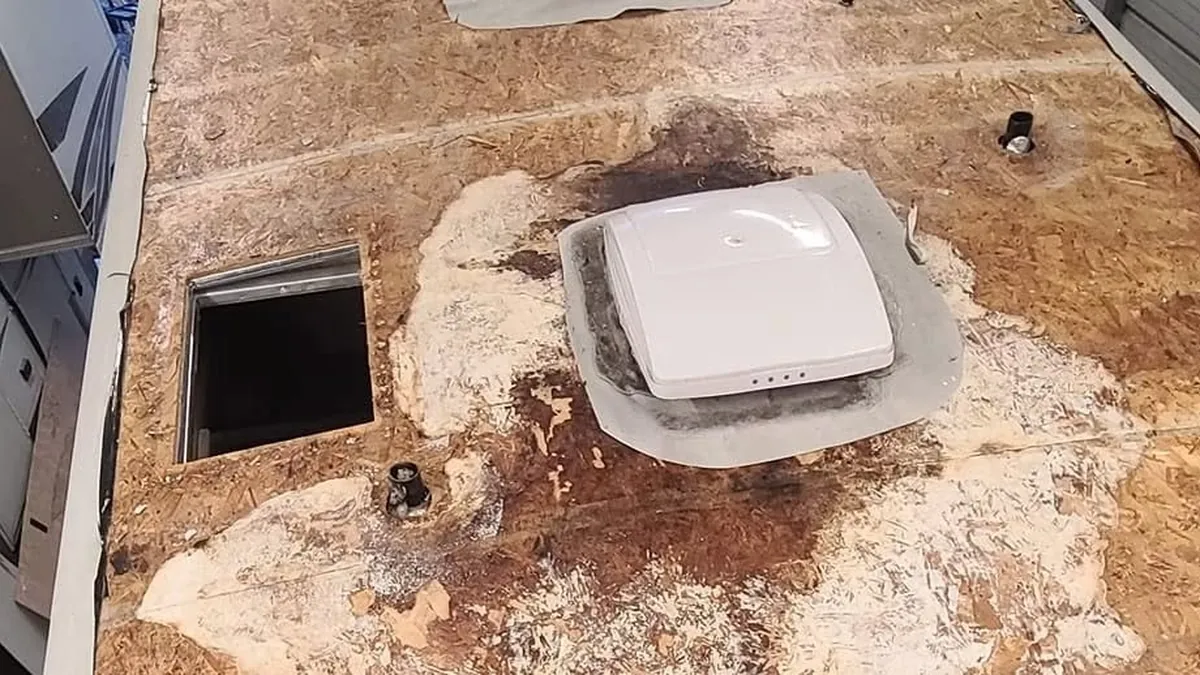
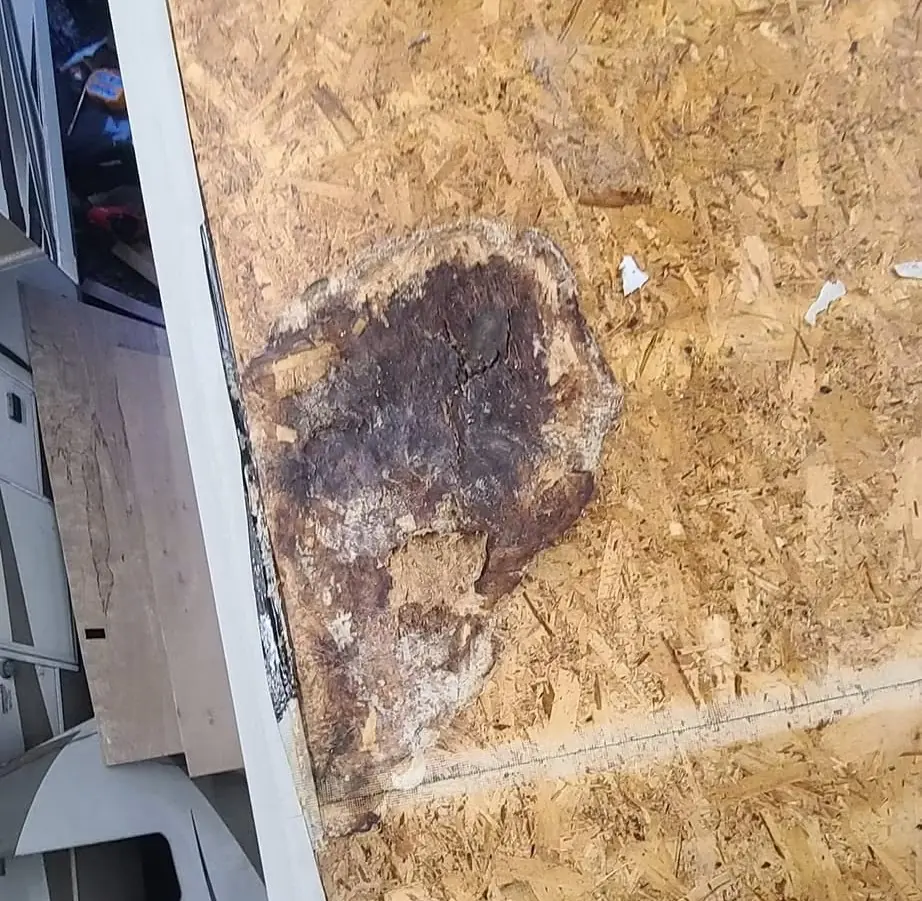
Most RV roofs are built in layers. Keystone RV’s 2027 owner’s manual describes a typical one: interior ceiling paneling, a truss system, insulation, roof decking of plywood or OSB, and a roof membrane glued to the decking. The membrane keeps water out, but the decking is what gives the roof its strength. When a seal fails, water gets under the membrane and soaks into that wood. Wet plywood and OSB lose strength, swell, delaminate and eventually rot, and that’s what you feel underfoot as a soft or spongy area.
Because the membrane is waterproof from above, it can hold water in once it’s gotten underneath. That’s why soft spots often grow quietly for a season or two before a stain ever shows up inside.
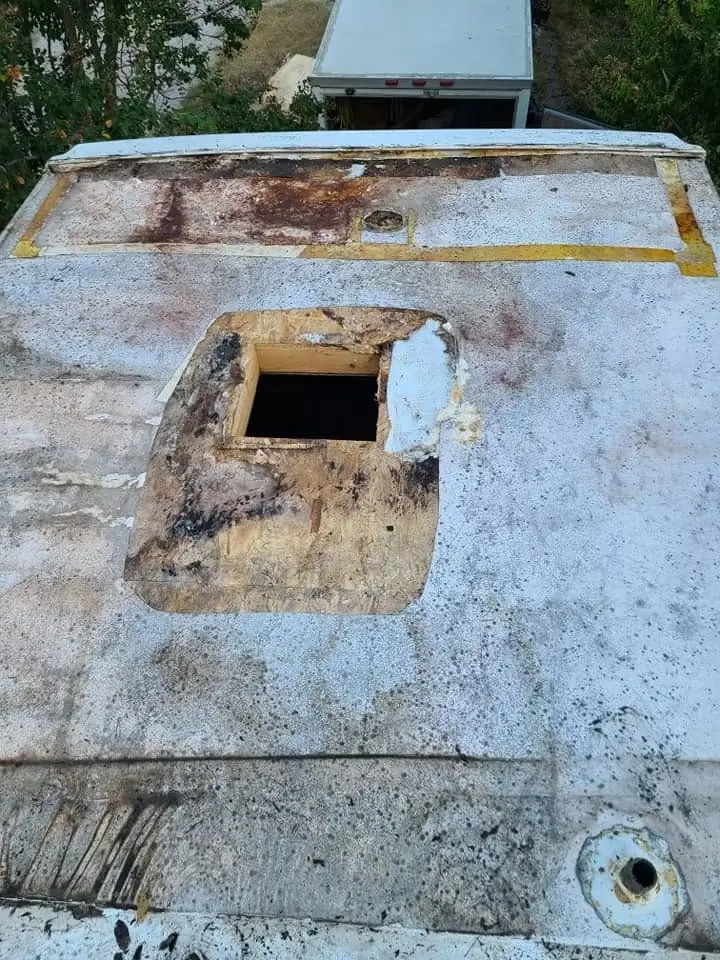
What causes soft spots
| Cause | Where you’ll find the soft spot |
|---|---|
| Failed sealant around vents, fans and skylights | In a ring or patch around the fixture, usually worst on the downhill side |
| Leaking AC gasket or blocked condensate drain | Around the AC opening |
| Cracked sealant at front and rear cap seams or termination bars | Along the roof edges and the front or rear of the roof |
| Punctures and tears from branches | Anywhere, often in the middle of the roof |
| Unsealed screws from antennas, solar mounts or racks | Small, localized spots near the mount |
| Standing water over a low spot | Where water sits after rain |
The common thread is time. Keystone tells owners to inspect roof seams, joints and attachments at least every 90 days because sealant deteriorates, and it notes that heavy sun, big temperature swings and cold climates speed that up. A crack that goes unnoticed for a year has a year to soak the decking.
How to find soft spots
- Check that your roof is walkable. Keystone says units with a factory ladder have walkable roofs, while some have walkable roofs without a ladder and others are neither. If yours isn’t, inspect from a ladder and leave the walking to a shop. Our guide to walking on an RV roof covers this.
- Pick a dry day. Keystone and Dicor both warn that a wet membrane can be slippery.
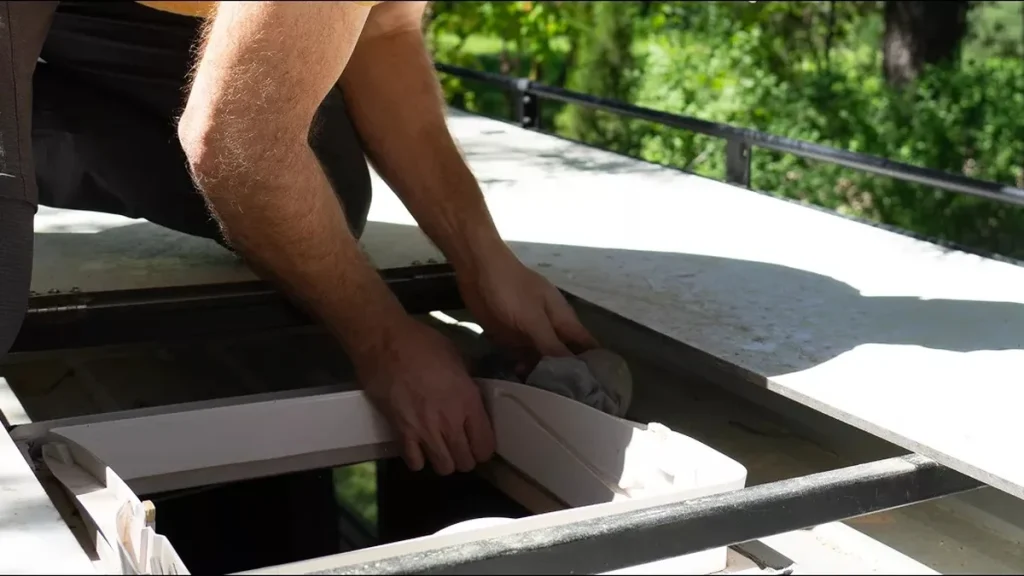
- Walk slowly near the edges and over framing, pressing gently with your foot around every fixture, along the front and rear caps and along both roof edges. Sound decking feels firm. A soft spot gives, feels spongy, or flexes more than the area around it.
- Press around each fixture by hand. Kneel and push on the membrane in a ring around every vent, fan, skylight and the AC.
- Look inside. Remove a vent’s interior trim ring and look at the edge of the decking around the opening. Dark, crumbly or damp wood confirms what you felt from above. Check ceiling panels for stains, bubbling or sagging.
- Mark and photograph each soft area with painter’s tape so you can measure it and show a shop or insurer.
Soft spot, bubble or air pocket?
Not every irregularity is rot. Two harmless things can look or feel similar:
- Air bubbles in the membrane. Dicor says bubbles can form with weather and humidity, at decking seams from flexing in transit, or when inside and outside temperatures differ a lot. It says they won’t affect the roof’s performance, that they come and go, and that you should not puncture them.
- Air pockets and spots from manufacturing. Keystone notes that debris such as wood, staples or screws trapped between the membrane and decking can leave visible spots, and that these are usually cosmetic.
The difference is what’s under them. A bubble is the membrane lifting over sound wood; press around it and the decking is firm. A soft spot is the wood itself giving way. If you’re not sure, the interior trim ring check or a moisture meter reading from inside will usually settle it.
One more thing to watch for: Dicor says products containing petroleum distillates can make an EPDM membrane swell or balloon, leaving uneven thickness and loose areas. That’s membrane damage rather than rot, but it can let water through and lead to rot later.
How bad is it? Soft spot severity checklist
Tick what you’ve found. The checklist sorts it into one of four levels and tells you what usually comes next.
Soft spot severity checklist
Tick everything that applies. This is a guide to what you’re likely dealing with, not a substitute for opening the roof up.
On the roof
Inside
Why you shouldn’t wait
A soft spot doesn’t stabilize on its own. As long as water keeps getting in, the rot spreads outward from the leak and down into the framing and insulation. Rotted decking also stops holding screws, so the fixture that leaked in the first place loosens, and the leak gets worse. Mold comes along with it: Keystone’s manual, citing the EPA, advises cleaning and drying damp materials within 24 to 48 hours to prevent mold growth, and says mold isn’t covered by its limited warranties. The longer a soft spot sits, the more decking, framing and interior has to be replaced.
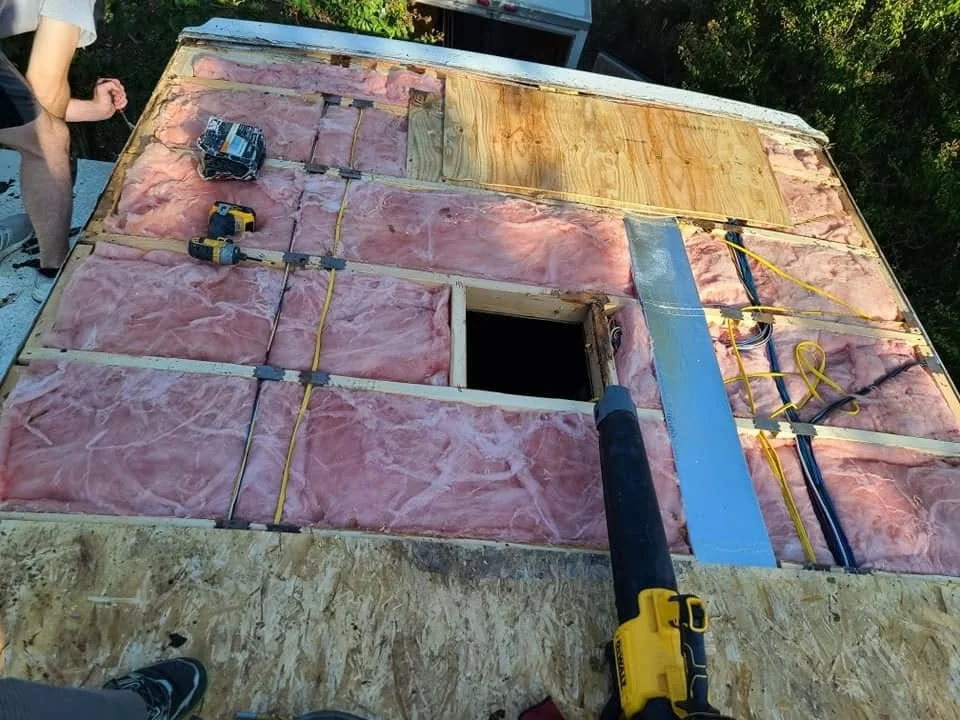
How a soft spot is repaired
There’s no coating, sealant or tape that fixes rotted wood. The rotted section has to come out. Here’s how a localized repair around a fixture usually goes.
- Find and stop the leak. Use the locator in our leak repair guide to confirm the source. Repairing the wood without fixing the leak just restarts the clock.
- Remove the fixture nearest the damage, along with its old sealant and butyl.
- Open the roof. Cut or peel the membrane back far enough to see the full extent of the rot. Expect it to be larger than the soft area you felt.
- Cut out the rotted decking back to solid, dry wood, ideally so the cut edges land over roof framing for support.
- Inspect the framing and insulation. Replace wet insulation and repair or sister any damaged trusses or rafters before closing up.
- Dry everything. Fans and a dehumidifier, until the framing reads dry on a moisture meter.
- Install new decking of the same thickness, fastened to the framing, with joints flush so the membrane lies flat.
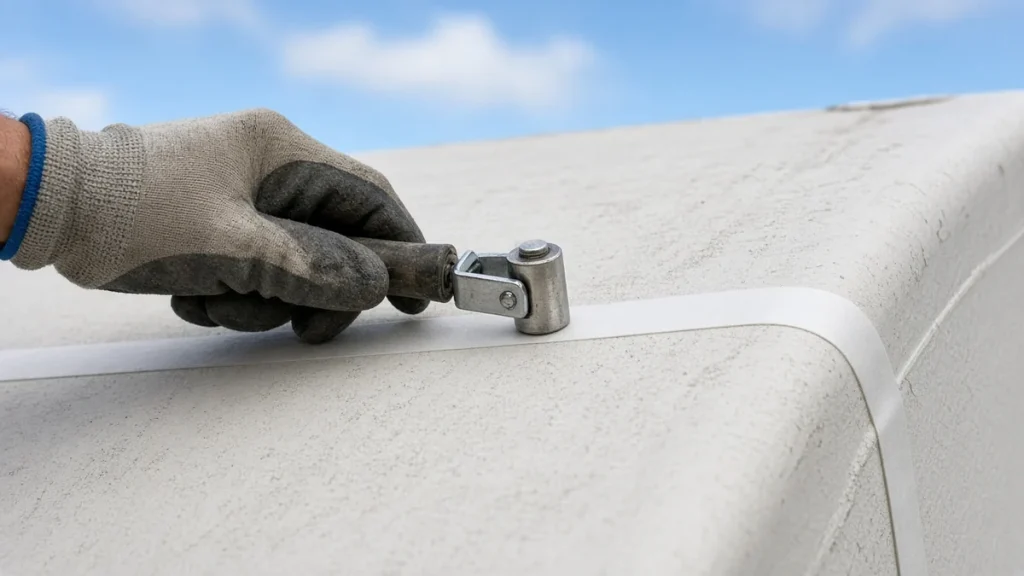
- Restore the roof surface. On a membrane roof that might mean a repair patch, a new membrane section, a full new membrane or a coating system over the repaired deck. Note that Dicor says rubber-to-rubber adhesive bonding doesn’t work, because its adhesive needs a porous surface, so membrane patches are done with repair tape or kits made for the purpose.
- Reinstall the fixture on fresh butyl putty tape and finish with lap sealant compatible with your roof. Our RV roof vent guide walks through that step.
A handy owner with carpentry skills can do a small, single-fixture repair. Once the rot spans more than one area, reaches the framing or runs along a roof edge, it’s usually better handled by a shop that can keep the roof dry and covered while it’s open. Our post on DIY vs professional roof repair helps you decide.
Tools and materials for a small repair
- Moisture meter, flashlight and painter’s tape for mapping the damage
- Plastic scraper, utility knife and a cordless driver for removing the fixture and membrane
- Oscillating multi-tool or circular saw set to the decking depth, so you cut the wood without cutting into the framing
- Replacement plywood or OSB of the same thickness, plus screws long enough to reach the framing
- Replacement insulation if the old insulation is wet
- Butyl putty tape, lap sealant compatible with your roof, and a membrane repair kit or tape made for your roof type
- Fans and a dehumidifier for drying
Plan the job around the weather. Once the membrane is open, the roof needs to stay dry until it’s closed up again, so work under cover if you can, or keep a tarp ready.
Questions to ask a shop about soft spot repair
- How far will you open the roof? A good shop opens it until it reaches sound wood on every side, not just the area that felt soft.
- Is framing and insulation repair included? Ask how they’ll price it if they find more damage once the roof is open.
- What goes back on top? A patch, a new membrane section, a full membrane or a coating system, and which product.
- Where did the water come from? The quote should include fixing the original leak.
- What’s the warranty on the repair, and does it cover labor as well as materials?
When the whole deck needs replacing
Sometimes the soft spots aren’t isolated. Rot around several fixtures, along both edges or across large sections means the roof has had water getting in for a long time, and patching section by section can cost more than starting over. That’s a full roof replacement: the membrane comes off, the decking is replaced, and a new roof surface goes on. Dicor states that the decking must be replaced any time a roof replacement is done, because its adhesive needs a fresh, porous substrate. Our RV roof replacement guide covers the process, costs and options, including the repair, recoat or replace decision.
Once the deck is new and sound, you have a choice of surface. Some owners go back to a membrane; others choose a professionally sprayed roof, which forms one continuous membrane over the deck and wraps around fixtures. Applicators using ArmorThane products can choose from three RV roof systems: ArmorSeal 100 AL, SureGrip with a UV topcoat, or ArmorFlex UV, described on ArmorThane’s RV roof coatings page. Other systems and applicators are available too; compare them in our coating comparison.
What drives the cost of a soft spot repair
Every soft spot repair is priced differently, because the real size of the job only shows up once the roof is open. The main factors are how much decking has to come out, whether the framing and insulation need work, how many fixtures have to be removed and reinstalled, what goes back on top (a patch, a membrane section, a full membrane or a coating), and whether interior panels were damaged. Catching rot while it’s still a single spot around one vent keeps every one of those factors small. For full roof figures, see our replacement guide.
Can you coat over a soft spot?
No. A coating is a skin. It can’t add strength to rotted wood, and coating over wet decking traps the moisture so the rot keeps going under a surface that looks new. Any reputable coating system, roll-on or sprayed, starts with repairing soft decking. If someone offers to coat over soft spots without opening them up, get a second opinion. Our RV roof coating guide explains what coatings can and can’t fix.
Soft spots, warranties and insurance
Rot from a slow leak is usually treated as a maintenance issue. Jayco, for example, says that failure to properly maintain or reseal a unit can lead to serious water damage and disqualifies the unit from coverage under its towable limited warranty. Insurance is more likely to respond to sudden damage, such as a branch puncture or storm, than to long-term seepage. Dated photos of the damage and records of your inspections make any claim easier. Our posts on RV insurance and roof coverage and the RV roof warranty guide go deeper.
How to prevent soft spots
- Inspect sealant every 90 days. That’s Keystone’s interval for roof seams, joints and attachments. Our guide to how often to reseal explains the intervals other makers publish.
- Keep the roof clean so cracks are visible, using a cleaner your roof maker approves; see our RV roof cleaner guide.
- Fix small leaks immediately and dry the area out.
- Clear snow before it builds up. Keystone warns that snow loads over 2 feet or 30 pounds per square foot can damage the roof structure.
- Follow a routine. Our roof maintenance schedule builds one around your roof and climate.
Checking for soft spots before you buy a used RV
Soft spots are one of the most expensive surprises in a used RV, and they’re easy to miss on a quick walk-through. If the roof is walkable, walk it slowly and press around every fixture and both edges. Inside, look for stains, bubbled or sagging ceiling panels, and a musty smell, especially in upper cabinets and around vents. Remove a vent trim ring if the seller allows. A moisture meter is worth bringing. Our buyer’s roof inspection checklist covers the rest.
Frequently asked questions
What causes soft spots on an RV roof?
Soft spots are almost always wet or rotted wood decking under the membrane. Water usually gets in through failed sealant at a vent, skylight, AC, seam or roof edge, or through a puncture, and soaks into the plywood or OSB.
Is a bubble on my RV roof a soft spot?
Not necessarily. Dicor says air bubbles in its membrane can come and go with weather and humidity, don’t affect performance and shouldn’t be punctured. If the wood around the bubble feels firm, it’s likely a bubble; if the wood itself gives, it’s a soft spot.
Can I just coat over a soft spot?
No. Coatings and sealants can’t strengthen rotted wood, and coating over wet decking traps moisture so the rot continues. The rotted decking has to be cut out and replaced first.
Can I repair an RV roof soft spot myself?
A small soft area around one fixture is a realistic DIY job for an owner with basic carpentry skills: stop the leak, cut out the rotted decking to solid wood, replace it and reseal. Soft areas in several places, along edges or with sagging ceilings are better left to a shop.
How do I prevent soft spots on my RV roof?
Inspect sealant at every seam, joint and fixture at least every 90 days, as Keystone RV recommends, keep the roof clean so cracks are visible, and fix small leaks right away before water reaches the decking.
Is it safe to drive an RV with a soft roof?
A small soft spot is not usually a road hazard, but sagging ceilings or soft walls point to structural damage. Stop active leaks, keep people and weight off the roof, and have it assessed before more travel.
Sources
- Keystone RV: 2027 Owner’s Manual (roof assembly, 90-day inspections, walkable roofs, snow load, mold and leak mitigation)
- Dicor Products: FAQ (air bubbles, petroleum distillates, decking replacement, adhesives)
- Jayco: How to keep your RV sealed properly (sealant maintenance and warranty)
- Camping World: RV roof types
Free quote
Ready to stop resealing?
Get a seamless polyurea roof from a certified applicator near you. Tell us about your rig in about a minute.